1. Create an account
Required.
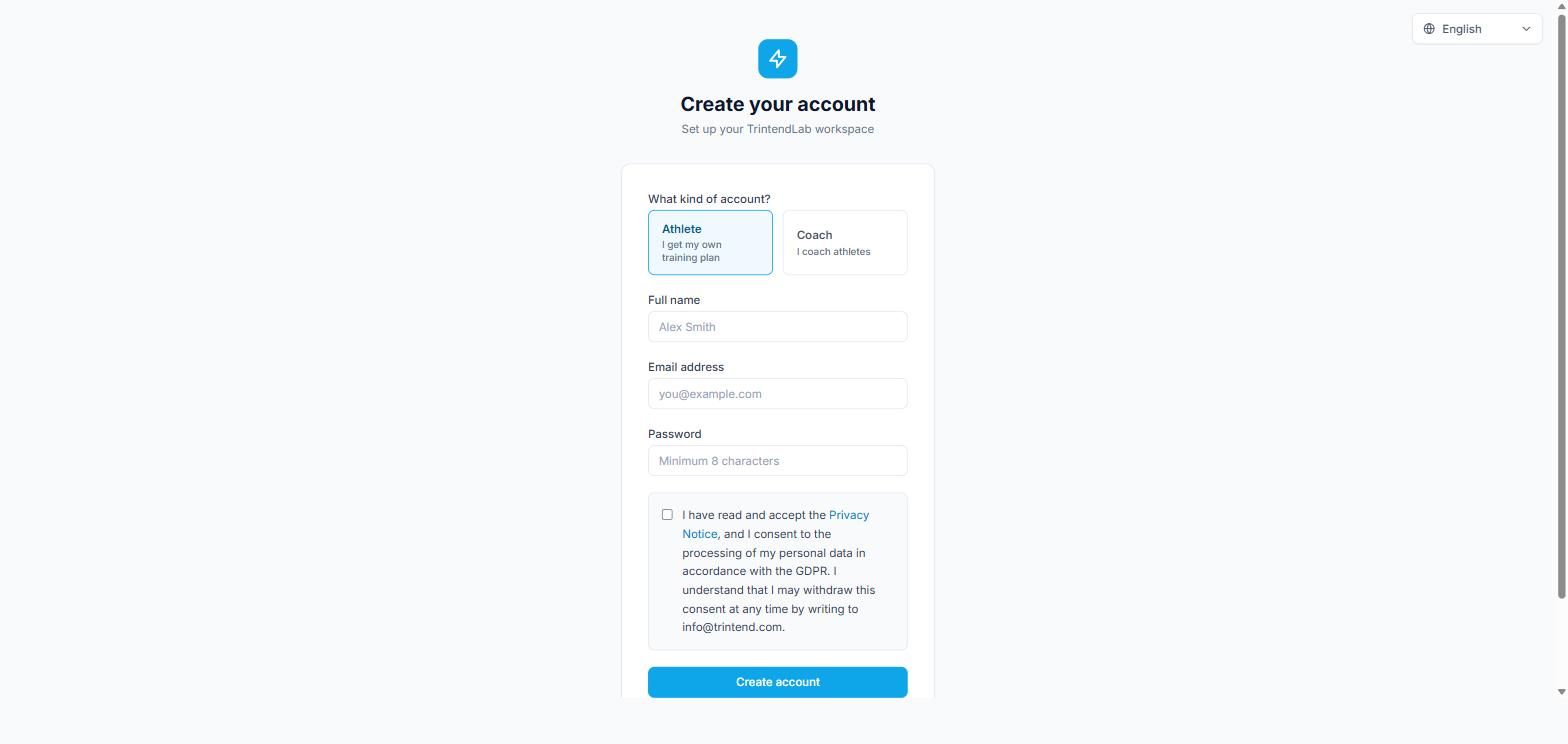
Open app.trintend.com/auth/register and choose Athlete. You need your full name, an e-mail address and a password of at least 8 characters.
You have to accept the data-processing consent here. You can withdraw it at any time by e-mail to info@trintend.com.
2. Athlete profile
Required.
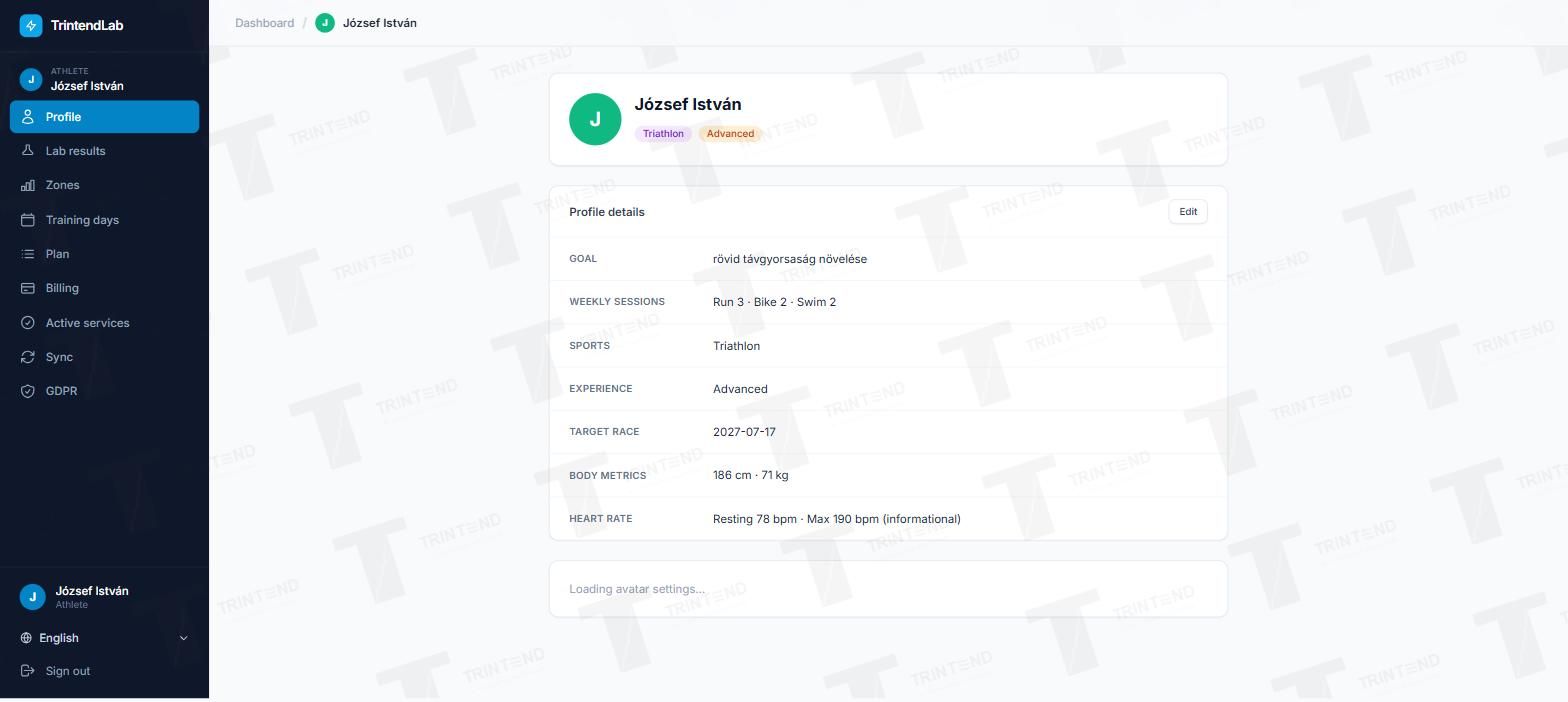
After your first login you start by filling in your profile: your sports (you can pick several and mark one as your main sport), your goal in a few sentences, and how many days a week you can train. Experience level and target race are optional, but the plan fits you better if you add them.
This is where the zone estimate and the outline of the four-week plan start from. You do not have to pay anything yet.
3. Your AI companion's tone
Optional.
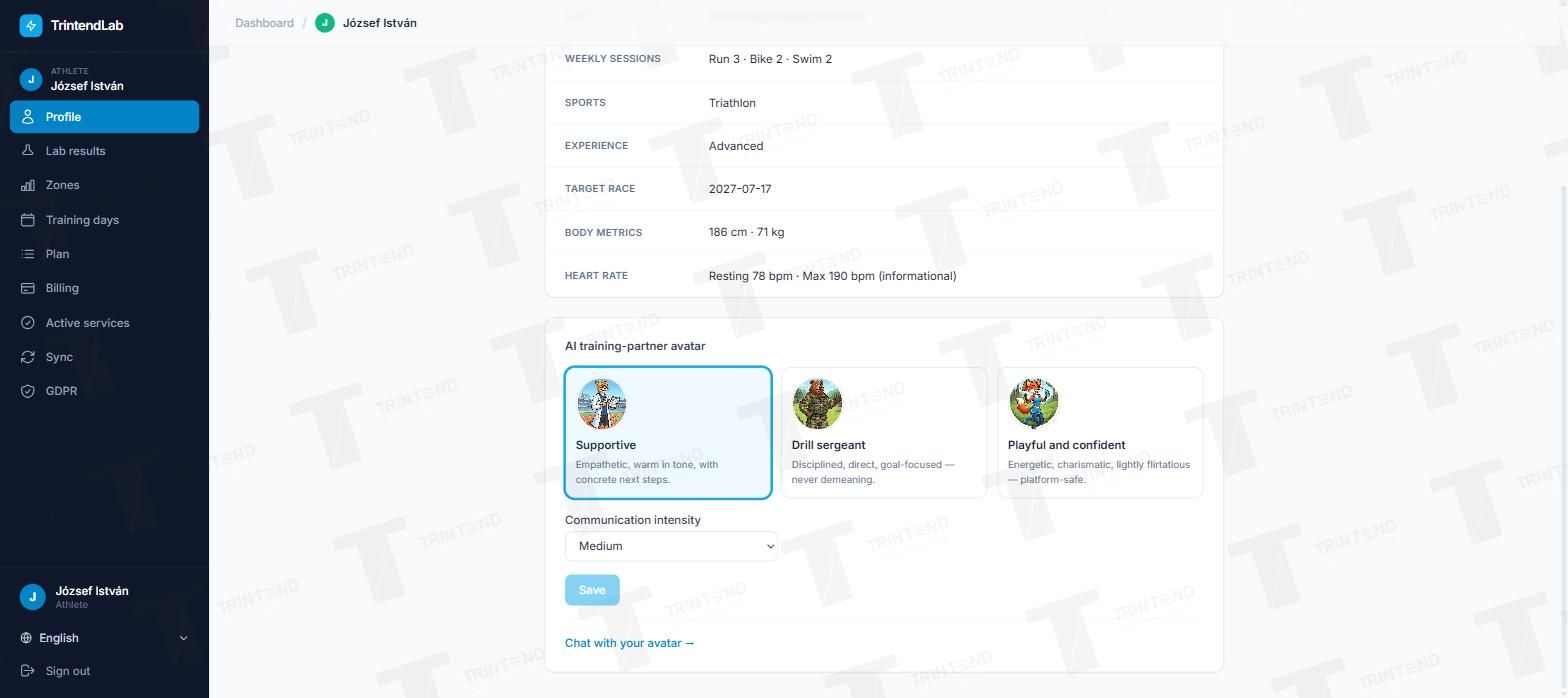
You can choose how the AI training companion talks to you: Supportive, Drill sergeant or Playful and confident. You can also set how active it is: low, medium or high.
You can change this on the Profile page at any time.
4. Where your zones come from
Pick one of three options.
The intensity of every session is based on your zones, so this step is worth doing carefully.
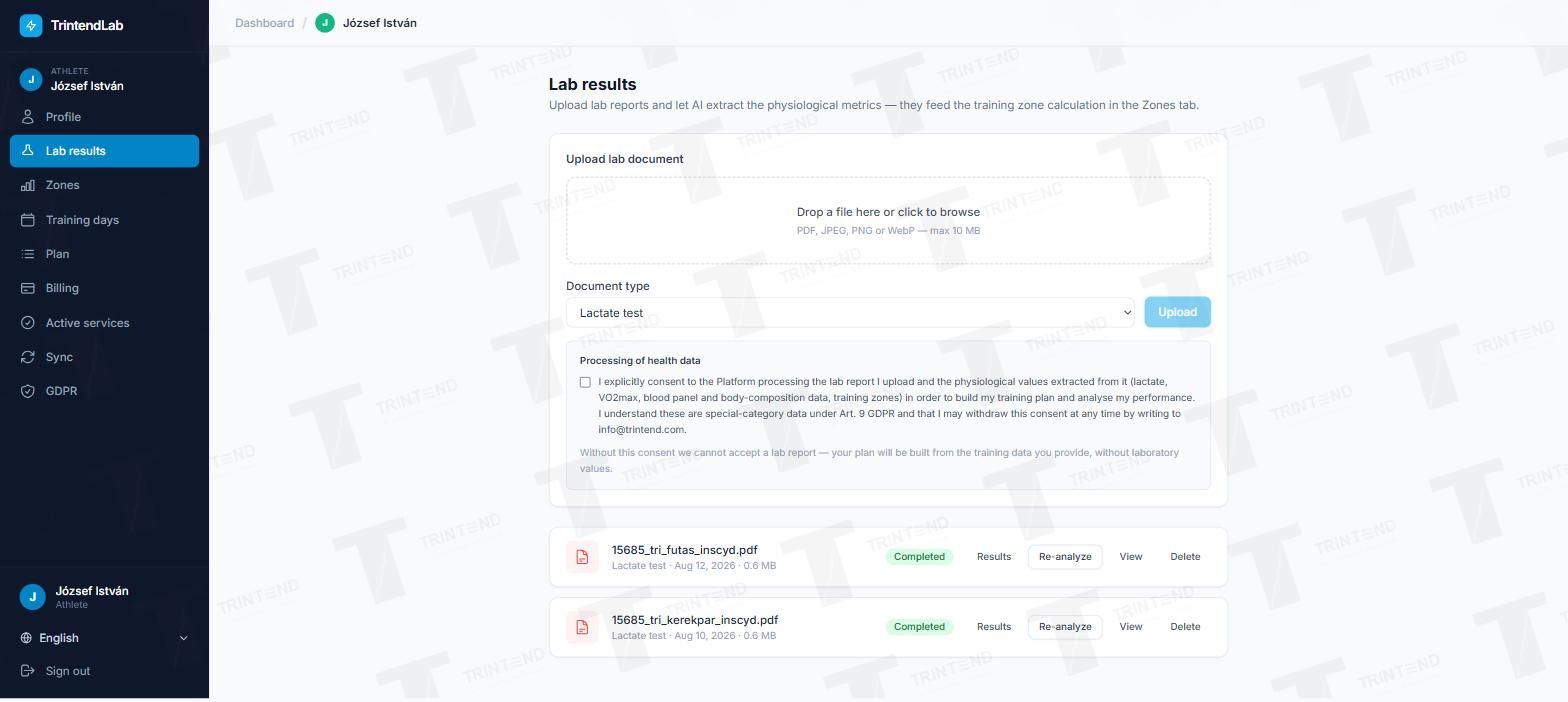
Lab report. On the Lab results page you can upload your lactate or spiroergometry test (PDF, JPEG, PNG or WebP, up to 10 MB). Because this is health data, the app asks for a separate consent. The first three reports are evaluated free of charge, so you see your zones before you buy anything.
T0 starter test. If you have no recent lab result, you can request a short, fully described test session on the Zones page. Its result is read from Intervals.icu, so do step 7 first.
Your own values, or an estimate. On the Zones page you can enter your own values per sport (LTHR, maximum heart rate, threshold pace, VO₂max). If you enter nothing, the app estimates from your profile, which is less precise.
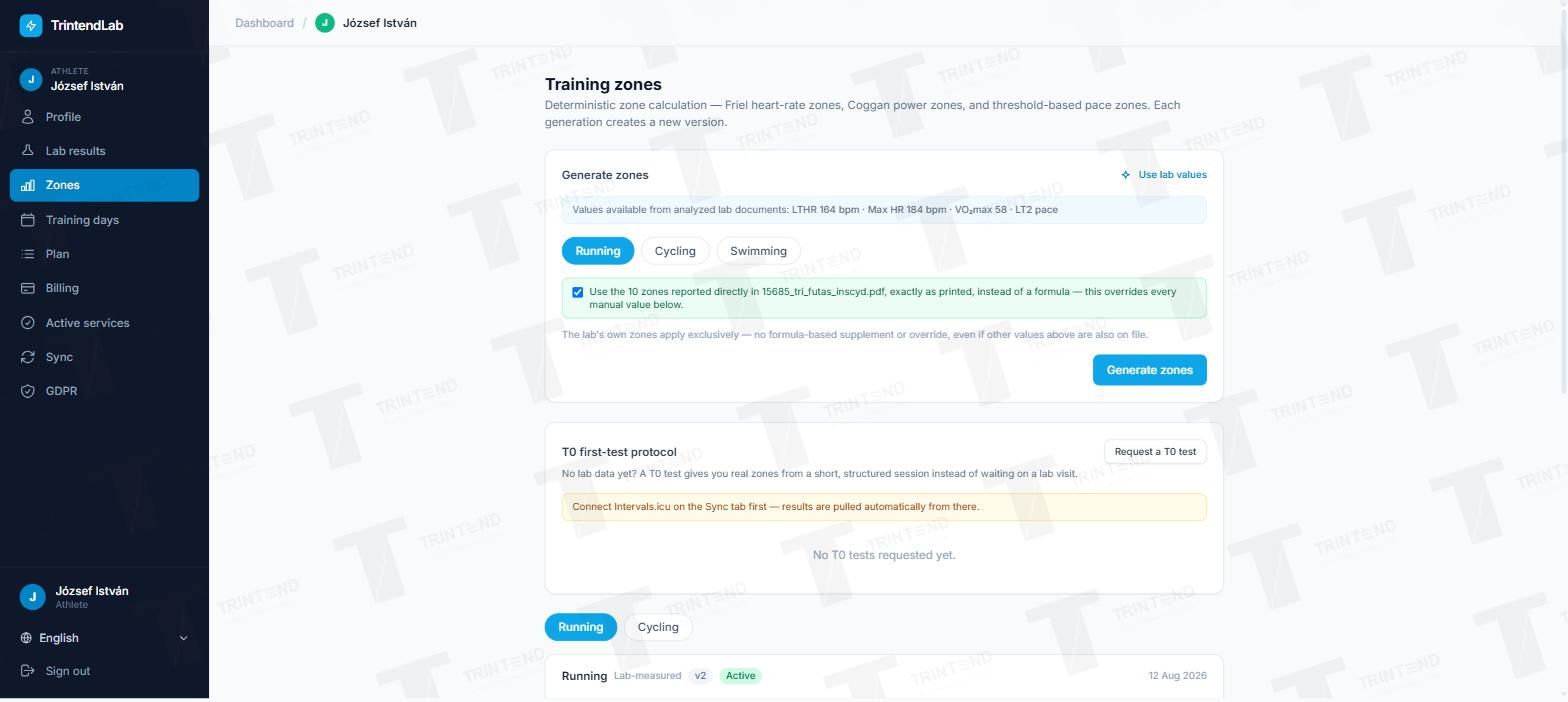
5. Training days for the next four weeks
Required before purchase.
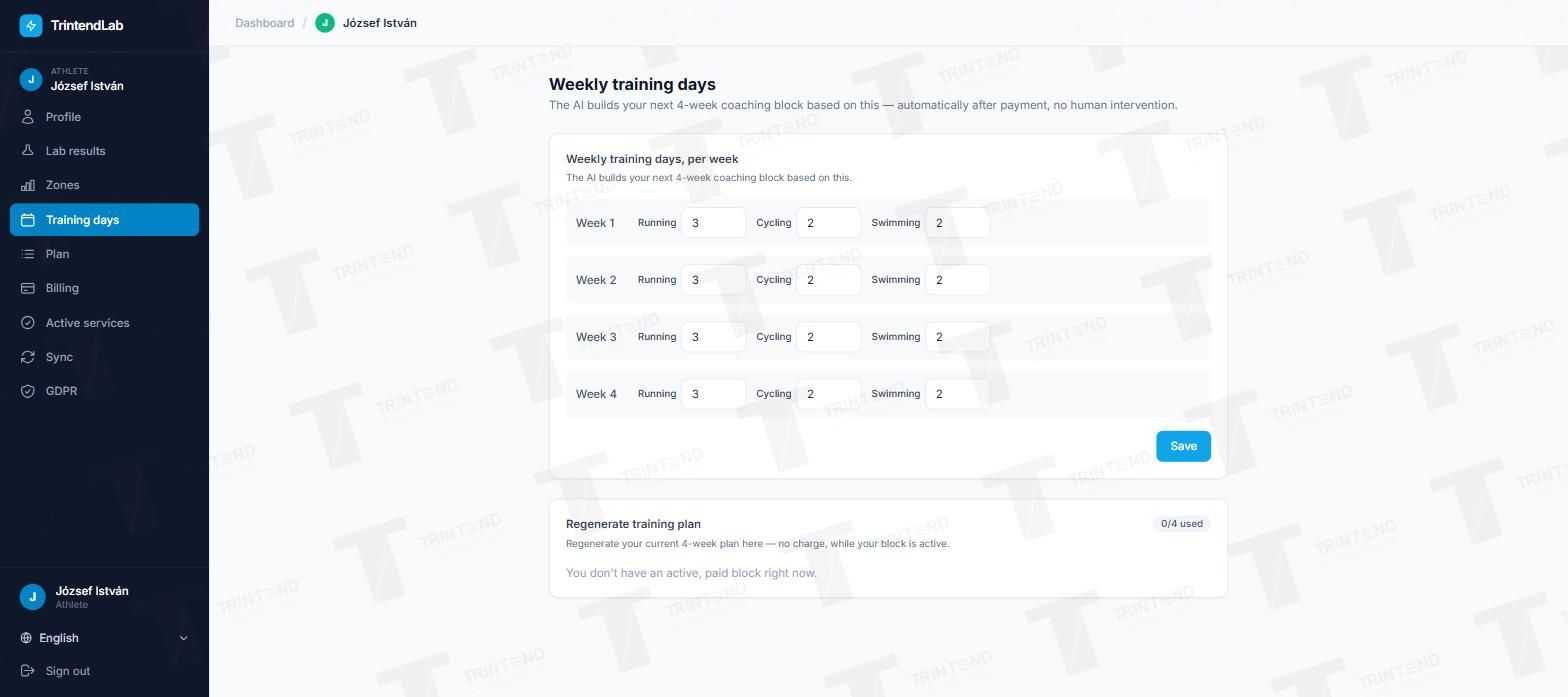
On the Training days page you set, for each of the four weeks separately, how many days you train per sport. A week with travel or a busy schedule can get fewer days. After payment the plan is built from this automatically.
6. Billing details and package
Required to buy.
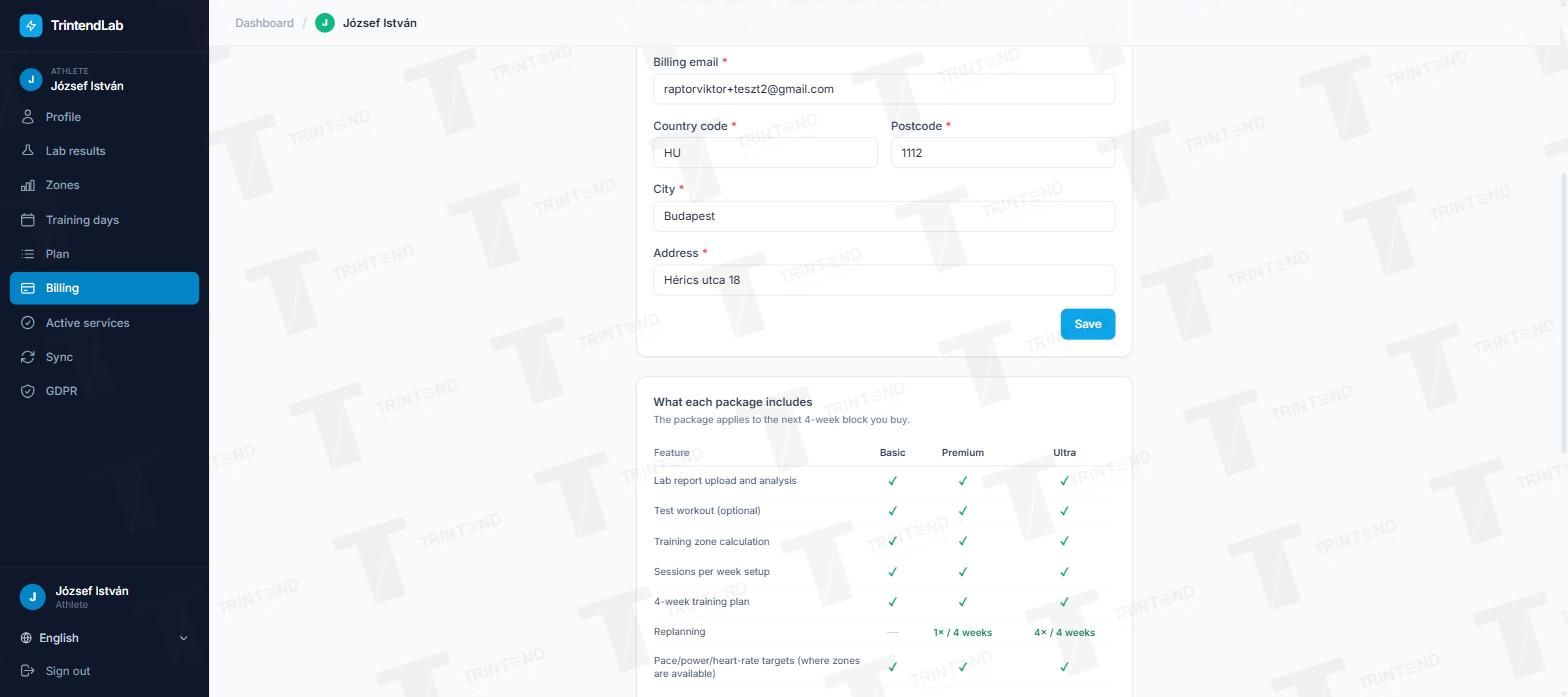
On the Billing page, enter your billing details: name, billing e-mail, address and, if you have one, a tax ID. You cannot pay without them, because the invoice is issued to these details.
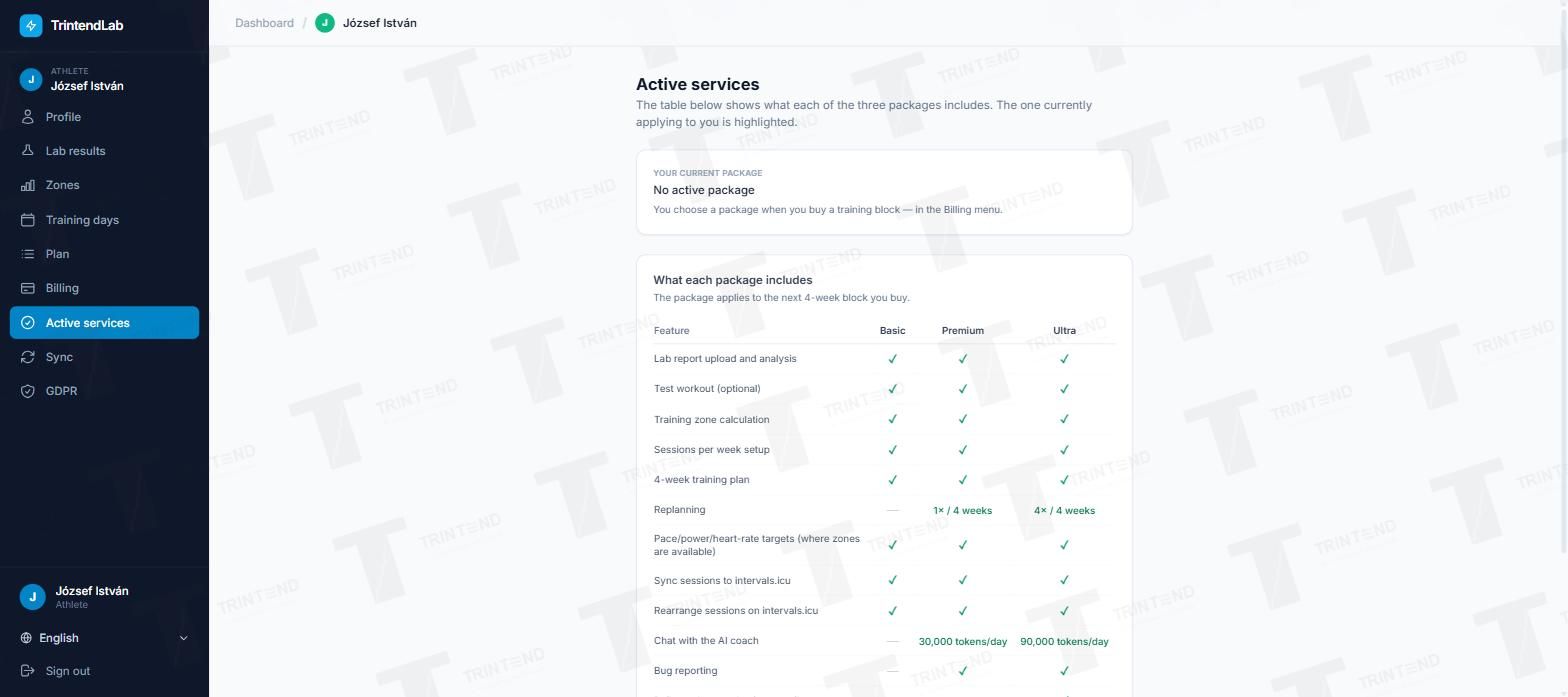
What each package (Basic, Premium, Ultra) includes is shown in a table on the Active services page. Your first block comes with Ultra content at an introductory price. From the second purchase on you choose the package.
You can lower the price of your next block with the motivation game. If you work with a coach, your coach decides whether the game is part of your work together.
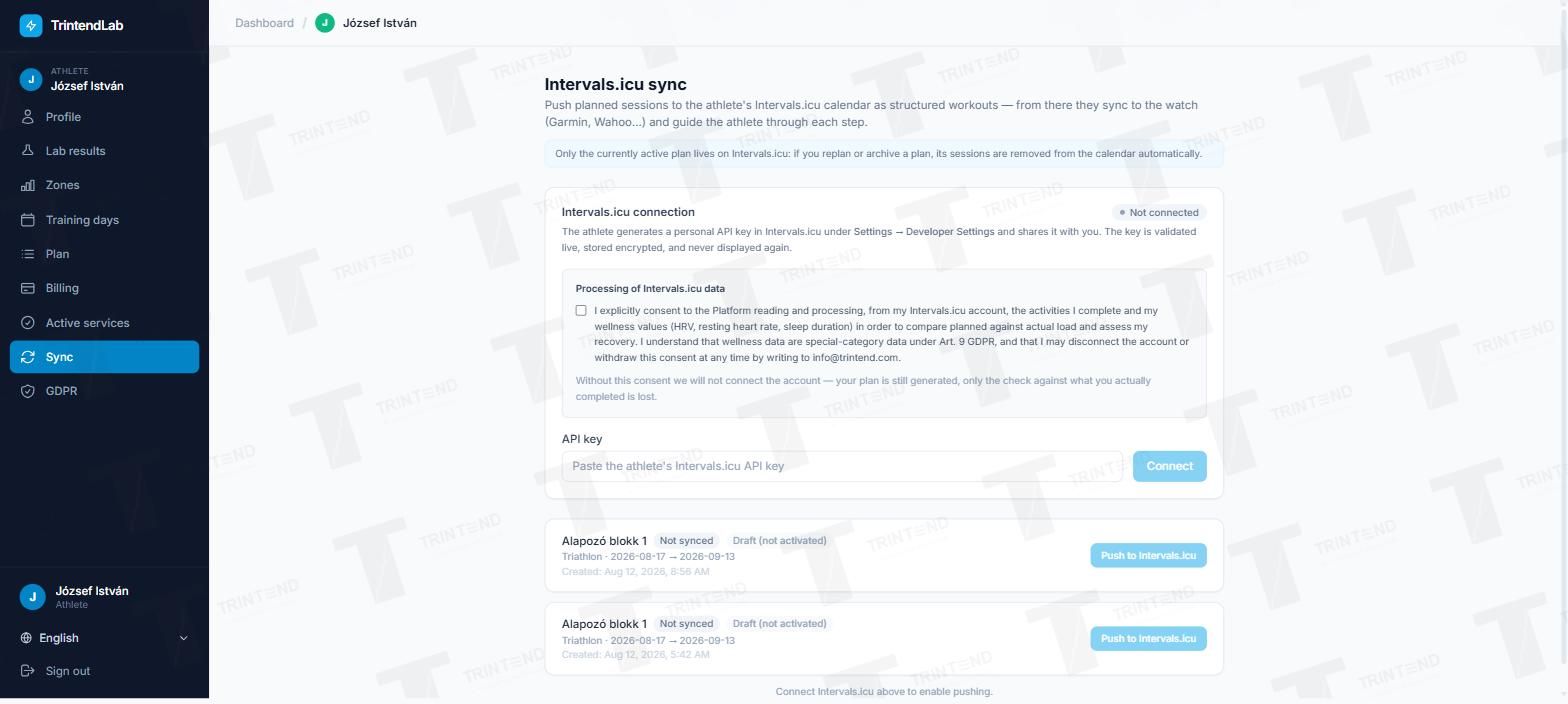
7. Connect Intervals.icu
Optional, you can do it later.
Intervals.icu sends your sessions to your watch (Garmin, Polar, Wahoo, Suunto, Coros), and your completed workouts come back through it. The plan is built without it too, it just will not appear on your watch.
Sign up for free at intervals.icu and connect it to your watch account. Then create an API key under Settings → Developer Settings and paste it on the Sync page. The app tests the key before saving it, then stores it encrypted and never shows it again.
Only the sessions of your current plan are in the Intervals.icu calendar. If you replan or archive a plan, its old sessions are removed from there.
8. Your first training plan
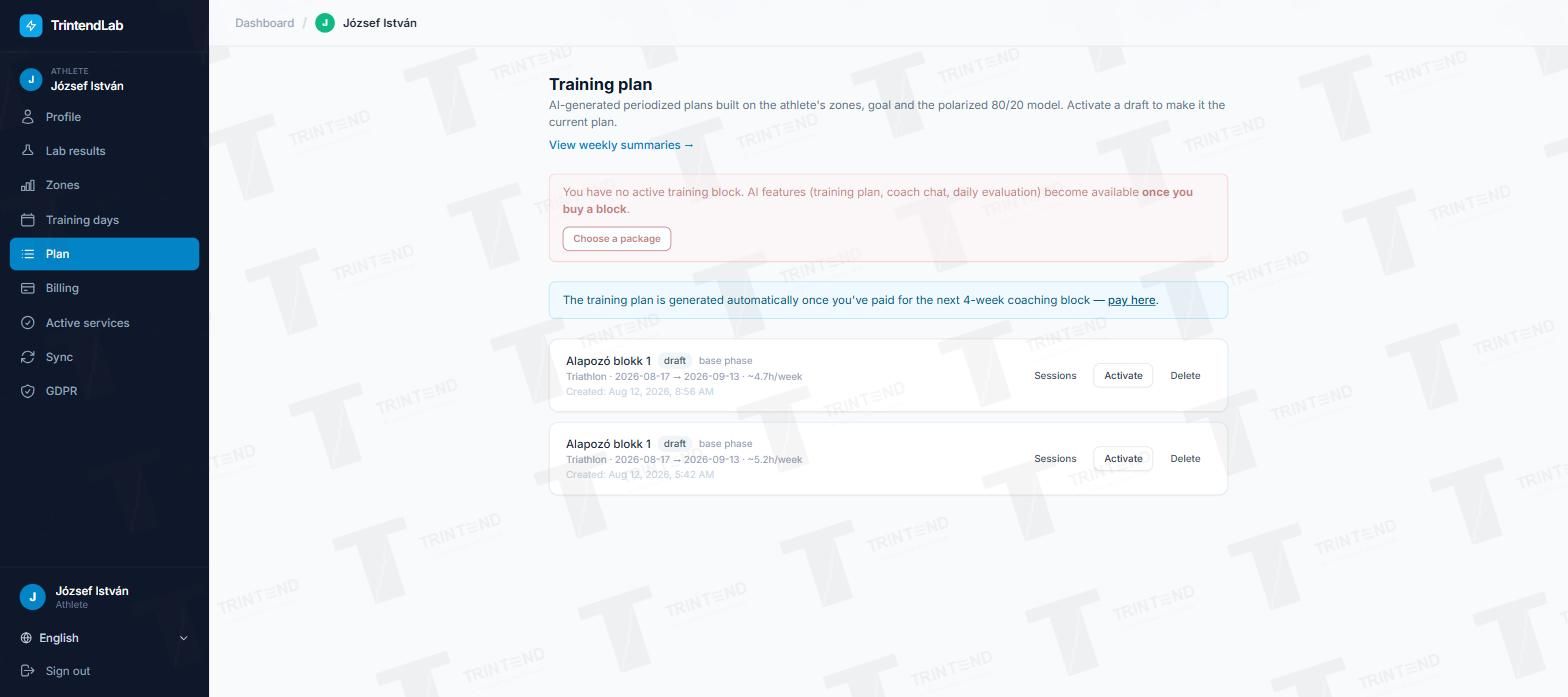
Built automatically after payment.
The Plan page shows where you are. Until you have a paid block, the AI features are locked. After payment the four-week plan is built without you having to ask for it.
This is also where you report an injury. While the injury is active, your next plan will be a recovery plan.
9. Download or delete your data
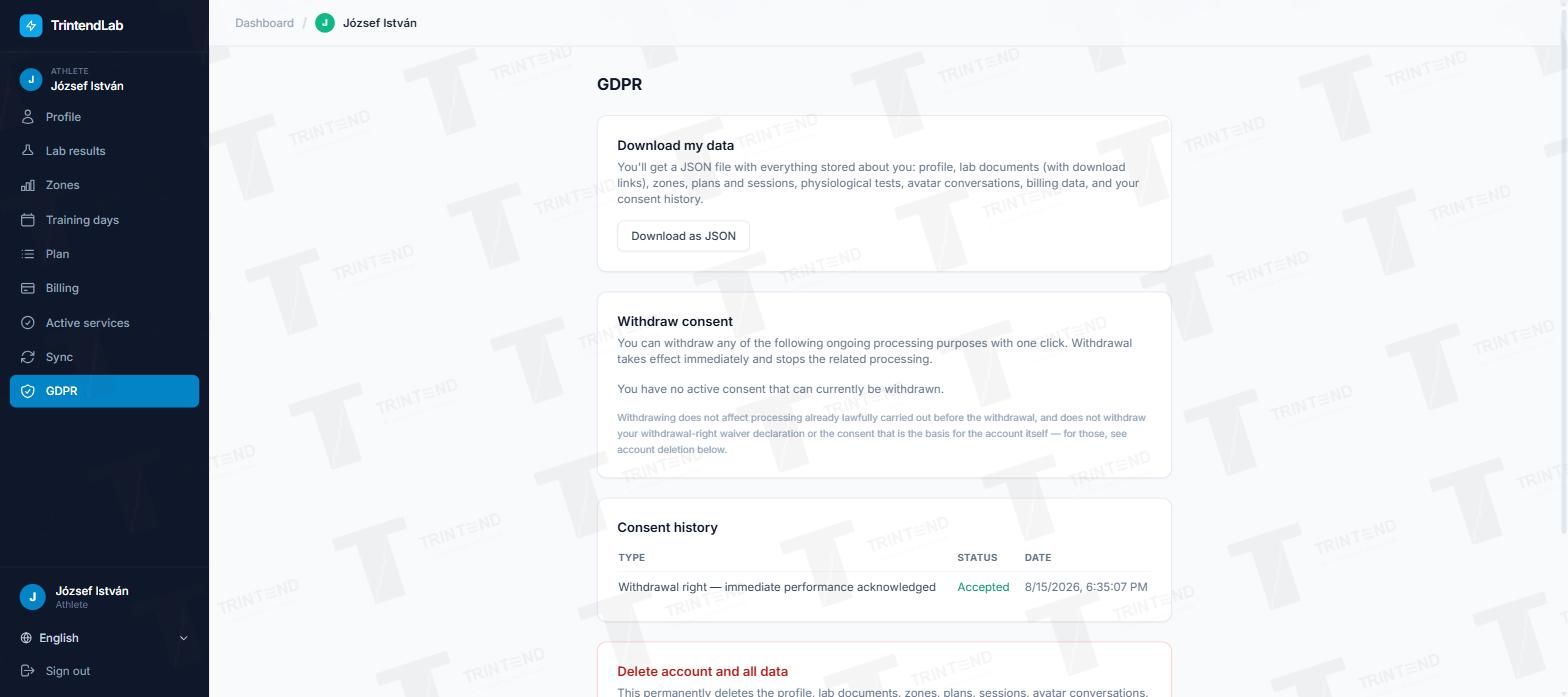
Available at any time.
On the GDPR page you can download all your data as a JSON file with one click: profile, lab reports, zones, plans, workouts, conversations with the companion, billing details and your consent history. You can also withdraw your consents here and delete your account permanently.
Where do I find it?
The screenshots were taken on 31 August 2026. Some screens may have changed a little since.